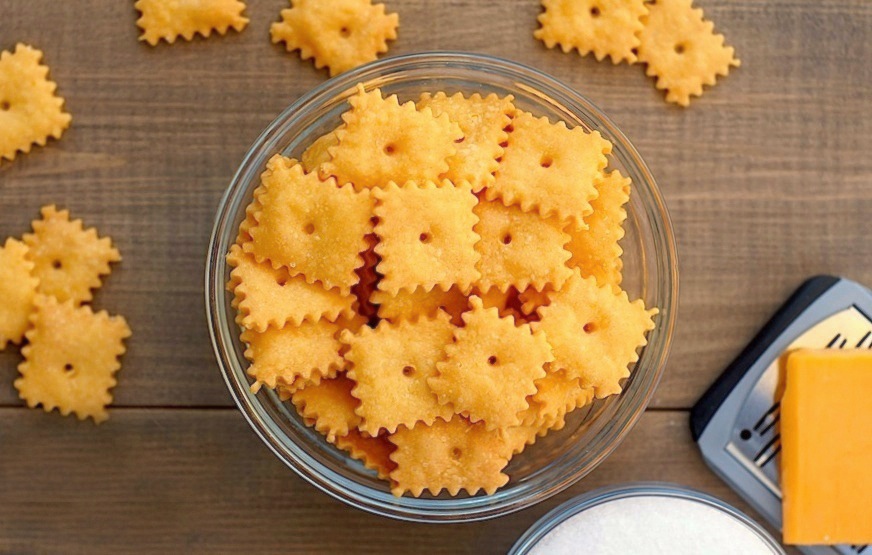
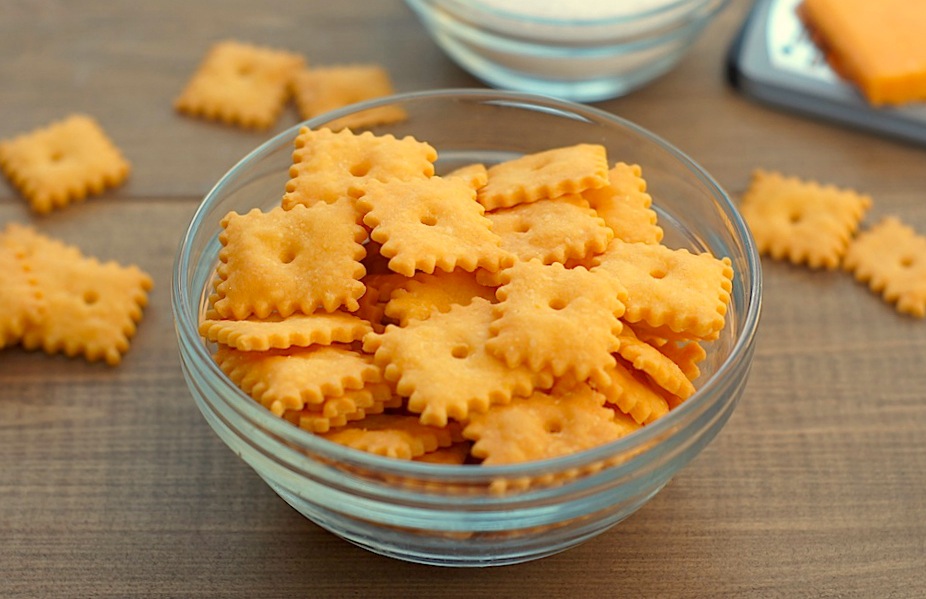
 i recently took a work trip to Chicago + while traveling, i got a case of the hungries, so i bought a mini-box of Cheez-Its. while i loved their salty cheesiness, i did not appreciate the strange chemical flavor they seemed to have, nor did i dig the lengthy list of ingredients on the side of the box. so, when i arrived home from my trip, i decided to try making them from scratch. and lo + behold, less than an hour + a mere 4 ingredients later, i had absolutely amazing homemade Cheez-Its!
y’all, these crackers are AMAZING! while they’re reminiscent of their mass-produced cousins, they’re different in some seriously good ways. they have such a bright, sharp, real cheese flavor with a crazy addictive buttery, melt-in-your-mouth consistency. my husband + i taste-tested these side-by-side with the store-bought kind + both agreed that the homemade version is on a whole different level – leaps + bounds tastier. the great news is, with only four ingredients + such an easy preparation, the homemade crackers are just as simple to prepare as they are delicious to eat!

Homemade Cheez-Its
makes about 7-8 dozen crackers, adapted from katrina’s kitchen + cooking ala mel
ingredients
6 ounces (1 1/2 cups coarsely grated) good-quality sharp cheddar, orange-colored if you want an authentic Cheez-It appearance
4 tablespoons (2 ounces) cold unsalted butter, cut into small cubes
3/4 cup all-purpose flour
1/4 teaspoon kosher salt (optional: additional salt for sprinkling on top)directions
combine all ingredients in a food processor, running the machine until the dough forms a ball, about two minutes. shape the dough into two separate disks, wrap in plastic wrap, + chill for at least 30 minutes in the refrigerator.
while the dough is chilling, preheat oven to 350°F.
when dough is cool, place between two pieces of wax paper, parchment paper, or silicone mats, + using a rolling pin, roll the dough out to a rectangle about 1/8-inch thick. using a pastry wheel (to get the fancy edges seen above) or a pizza wheel, cut the dough into a grid of 1-inch squares. use a toothpick or skewer to punch a hole into the center of each square. (note: as a salty snack lover, i sprinkled a bit of additional salt on top at this point.)
return the cut dough (still on the parchment/waxed paper/silicone mat) to the refirgerator for 10 minutes – this allows the dough to firm back up, which makes it super easy to transfer the individual crackers to a baking sheet prior to baking.
transfer individual crackers to a parchment or silicone mat-lined cookie sheet, leaving about 1/2-inch between crackers. bake at 350°F for 11-14 minutes, until crackers are puffed up + just starting to turn golden at the edges.
if you pull them out too soon + the crackers don’t have the desired crispiness you want, simply return them to the oven for 1-2 more minutes. remove from the oven and set the cookie sheet on a wire rack to cool.
print this recipe


 follow on pinterest
{ 73 comments… read them below or add one }
← Previous Comments
I don’t have a food processor – what else could I use? These sound yummy! I wonder also how other cheeses would be – I am thinking a pepper-jack
Hi Leslie, Do you have a stand mixer? That should work just fine in getting the dough to come together, too. If not, let me know, + I can give you instructions on how to do it by hand. And I think these would be great with pepper-jack – it has a similar consistency/moisture to cheddar cheese, so it should work great in the recipe!
Wow…these look gooood!!! I love the short ingredients list. Yay, for non-chemical laden snacks
I made these thinking my son would love them, but the 2 people eating most of them were myself and my husband. The whole batch didn’t even last a few hours. Thanks for sharing the recipe. We loved them!!! (I substituted white rice flour to make them gluten-free and they still worked perfectly)
That’s awesome to hear, Sandra! So glad that you loved them + I’m thrilled that the gluten-free version turned out great!
OMG, these are GREAT! Making them as part of my plates of goodies for friends, to add a salty addition. They’re easy and they’re delicious. Thanks for a great recipe.
I’m so glad you liked them, Miz! Aren’t they an awesome, easy snack? Enjoy!
I would also love to know if there is a way to make these without a mixer?!
Hi Jen, if you don’t have a food processor, high-powered blender, or stand mixer, you can try making them by hand. I have NOT tried them by hand, but here’s how I’d go about making them: Just blend the cheese (grated very finely) + butter into the flour + salt, using your hands or a pastry cutter, like you would with a quick bread. the texture will start out like sand, then mud, then clay – the clay-like consistency is what you want. You will *definitely* need to refrigerate the dough before you start cutting cracker shapes. Let me know how it turns out if you try them!
I came across your post through pinterest, and your cheez-its look the best of all the ones I’ve seen. I’ve tried making them, and I can’t get them to look like yours. Yours look thin and crisp, and mine always turn out puffy and flaky, much like the other ones I’ve found on pinterest. Any suggestions? I’m rolling them as thin as I can. I’m not sure what else to change…
Hi Lisa! Thanks for your kind words about my Cheez-Its. =) I have to be honest – my first instinct is to tell you to roll them out thinner, but since you’ve already done that, I’m not 100% sure what’s causing them to puff up. Have you tried keeping the dough very cold? if it comes to room temp, throwing them back in the fridge for 5-10 minutes before baking them? That could help. And are you poking a hole in the middle of them? My sense is that helps decrease puffiness, too. Hope that helps!
Yes, I’ve tried chilling them, but maybe I didn’t do it long enough. I’ve tried poking difference size holes, and that didn’t seem to make much difference. Maybe I’ll try chilling them even longer before baking and see if that helps. My husband loves the way they turn out, but I’m trying to get them a little more like true cheez-its. Thanks for the tips! =)
Thanks for the fabulous SRC recipe inspiration – I’m now obsessed with these little bites of magic ;D
I am so glad you liked ’em – your spin on the recipe is just awesome. =)
I just made the dough by hand! It’s in the refrigerator cooling right now! Will let you know how they turn out (:
Awesome, Victoria – do report back how they turn out!
Computers were my passion beginning in 6th grade (programmed
on a Vic 20, Tandy TRS 80 and an Apple IIe). Using good SEO practices will help
your site to rank on higher on sites like Google and therefore be found.
com has the common goal of helping you rise within the search rankings using your name as personal leverage.
I’ve made these before (using another recipe) and it was sooooooooo much work. This looks so easy. I will definately try yours out! One thing that was in the other recipe was tabasco sauce. It gave it a little kick that wasn’t too over powering. I’m going to try your recipe out as written first
Dan, I’ve done these with a pinch of cayenne for a little heat, too, and they turned out fantastic. =) Love your idea of using a bit of tabasco. Report back how they turn out for you!
This recipe is fantastic! I have been trying to move away from processed foods, but my kids (ages 5 and 3) LOVE to snack. Cheez-its are my daughter’s favorite, so when I saw this recipe I had to try it. She (along with the rest of the family) loves them! I have to make a double batch each time just to keep up. It feels so good to know exactly what I am putting into their little bodies instead of filling them with preservatives. These are so yummy, and I’ve shared this page with MANY other mothers who are trying to cut back on processed foods. THANKS!
Audrey, thank you SO much for popping in to share that awesome feedback! When I first made this recipe, I didn’t have any kids yet (and in fact, I was just newly pregnant). Now that I have an almost-2-year old at home, I appreciate recipes like this even more! My little one also loves to snack (don’t they all!), so this recipe is even more popular around our house now than it was when I first made them for just my husband and I. I’m so thrilled that y’all love them, and I so appreciate you passing on the recipes to other mamas!
These look great and easy enough! Do you think that almond flour would work?
Hi Gayle, I’ve never tried these with almond flour, so I’m not sure how they’ll turn out — I’ve only made the recipe as written thus far. Feel free to give it a try and do report back how they turn out!
← Previous Comments
{ 4 trackbacks }